March 14, 2024
No More Surprises in Snowflake with Resource Monitors
Avoid unexpected spend with Snowflake resource monitors.

Sahil Singla
Co-founder of Baselit

Setting up resource monitors in Snowflake is one of those no-brainer decisions if your Snowflake costs are a concern. Resource monitors perform a very important job of letting you know when you are spending more credits than you’re supposed to, and they are very easy to set-up. In fact, they are so easy to set up that one might question the need for a blog explaining how to do so. I’ll anyway go ahead and explain, because most people I have talked to haven’t set them up yet. At the very least, I hope this blog serves as a reminder that resource monitors exist.
What Are Resource Monitors?
A resource monitor, as the name implies, helps you keep track of how many credits are used by Snowflake’s virtual warehouses. It also lets you set credit usage limits, after which Snowflake will automatically suspend a warehouse. This feature provides a way to get alerts when you're nearing certain spending limits, ensuring you stay within your budget and avoid early contract renewal.
How do Resource Monitors Work?
Resource monitors can be set for one or more warehouses (a warehouse monitor) and for the whole account (an account monitor). You can have as many warehouse monitors as you like, but only one account monitor for each account.
For each monitor, you have to pick a schedule and certain actions. Let’s discuss schedule first. By default, when you set up a resource monitor, it starts monitoring credit usage immediately. You can change this start date to be a future timestamp. Optionally, the frequency at which the count resets can also be changed. The default frequency is monthly (i.e. credit usage resets to zero at the beginning of every calendar month). Other possible frequencies are daily, weekly, yearly, or never reset.
A resource monitor can perform three types of actions.
Notify - Sends a notification when a threshold is reached.
Notify and suspend - Sends a notification and suspends warehouses once queries have completed.
Notify and suspend immediately - Sends a notification, cancels running queries, and suspends warehouses.
How do I set up Resource Monitors in Snowflake?
A resource monitor can be created through either the Snowflake UI or SQL (the CREATE RESOURCE MONITOR command).
Note: Only users with ACCOUNTADMIN role can create resource monitors.
Using Snowsight UI
To create a new resource monitor, navigate to Admin > Cost Management. Select the Resource Monitors tab and click on the + Resource Monitor button. You should see a popup appear where you can start filling in the details.
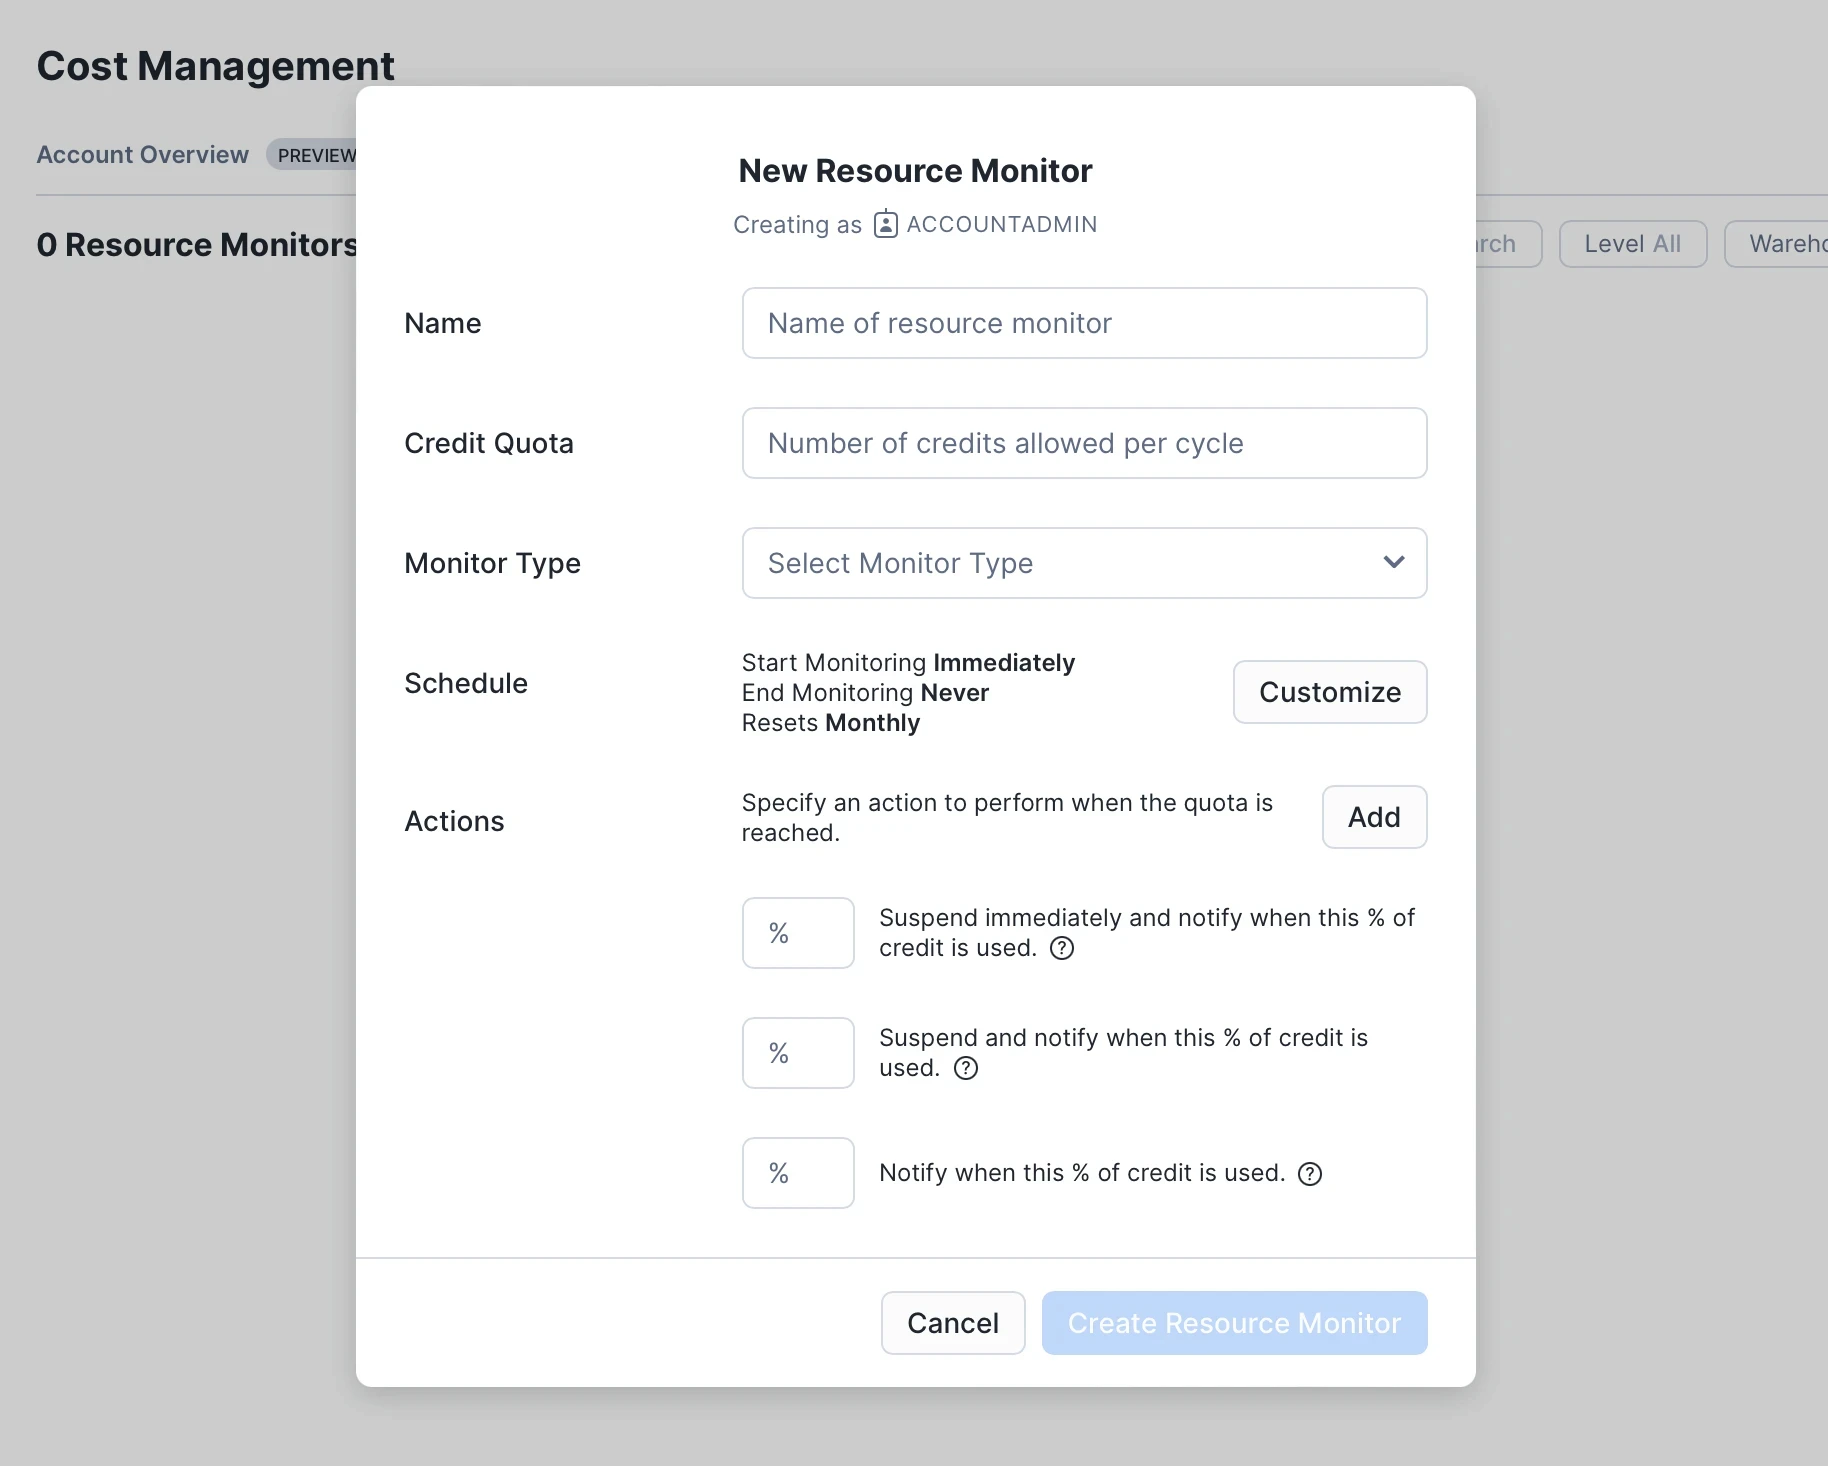
You will need to enter the following:
Name of the resource monitor
Credit Quota - your spend threshold for the cycle
Monitor type - account or warehouse monitor
Schedule - The start date, end date and the frequency of the reset cycle.
Actions - The actions that you want the resource monitor to perform, and the corresponding threshold values.
Using SQL
Snowflake lets you create a resource monitor with its CREATE OR REPLACE RESOURCE MONITOR command, and then assign it to one or more warehouses with ALTER WAREHOUSE and SET RESOURCE_MONITOR. Let’s take a look at an example. Suppose you want to create a resource monitor for the warehouse “transformer” with a credit quota of 100, that resets every month. We will also set up the following actions: notify at 80%, notify plus suspend at 90%, and notify plus suspend immediately at 100% of the credit limit.
Here’s the SQL query that you’ll need to run to create this resource monitor.
Some Useful Tips for Resource Monitors
Enabling notifications
Before you can start receiving notifications, you need to enable them on the Snowflake UI.
Make sure that your email is verified (here’s how you can do it).
Navigate to My Profile and select the “Email notifications from resource monitors”.
Sending notifications to other users
In its default configuration, a resource monitor will send notifications only to the user who created it (with Admin privileges). To enable notifications for other users, you can use the optional NOTIFY_USERS parameter in the CREATE RESOURCE MONITOR command that we used earlier (more on this here). All email addresses need to be verified, otherwise the SQL statement would fail.
Viewing resource monitors
If you want to view previously created resource monitors, either navigate to Admin > Cost Management > Resource Monitors on the Snowflake UI, or run SHOW RESOURCE MONITORS command.

